Introduction
In digital marketing and content management, URL shorteners are essential for improving user experience and streamlining analytics. Shlink, an open-source URL shortener, supports custom domains, detailed visit statistics, and API integrations, making it a top choice for developers. Paired with Clawcloud Run—which offers a perpetual $5/month container credit and an App Store for one-click installs—deploying Shlink has never been easier. This guide will walk you through setting up a high-performance URL shortener on Clawcloud Run, plus share advanced configuration tips and gotchas to watch out for.
1. Why Choose Clawcloud Run + Shlink?
1.1 Key Advantages of Clawcloud Run
- Zero-Cost Startup: Sign up and instantly receive $5/month in free credits for life (long-time GitHub users may enjoy permanent free access), no credit card required.
- High-Performance Specs: Free tier containers can be configured with up to 4 vCPUs, 8 GB RAM, and 10 Gbps bandwidth—more than enough to handle spikes in short-link traffic.
- Simplified Deployment: The built-in App Store lets you install popular applications with a single click. Docker image compatibility ensures both beginners and seasoned devs can get running in minutes.
1.2 Why Shlink Stands Out
- Data Privacy & Compliance: Self-hosted deployment keeps your analytics in your control—fully GDPR-compliant.
- Feature-Rich: Out-of-the-box support for link expiry, QR code generation, geolocation tracking (with GeoLite2), and visit-limit rules.
- Extensible Ecosystem: Comes with a web dashboard and a REST API for easy integration with tools like Google Analytics, CRM systems, and more.
2. Step-by-Step: One-Click Shlink Deployment
2.1 Sign Up and Log In
link to APP Store: https://template.run.claw.cloud/?openapp=system-fastdeploy%3FtemplateName%3Dshlink
- Go to the Clawcloud Run Console.
- Register with your GitHub account (accounts older than 180 days unlock permanent free credits).
- We recommend selecting the Singapore region for lower latency and more reliable SSL issuance.
2.2 Deploy Shlink via the App Store
- Navigate to App Store
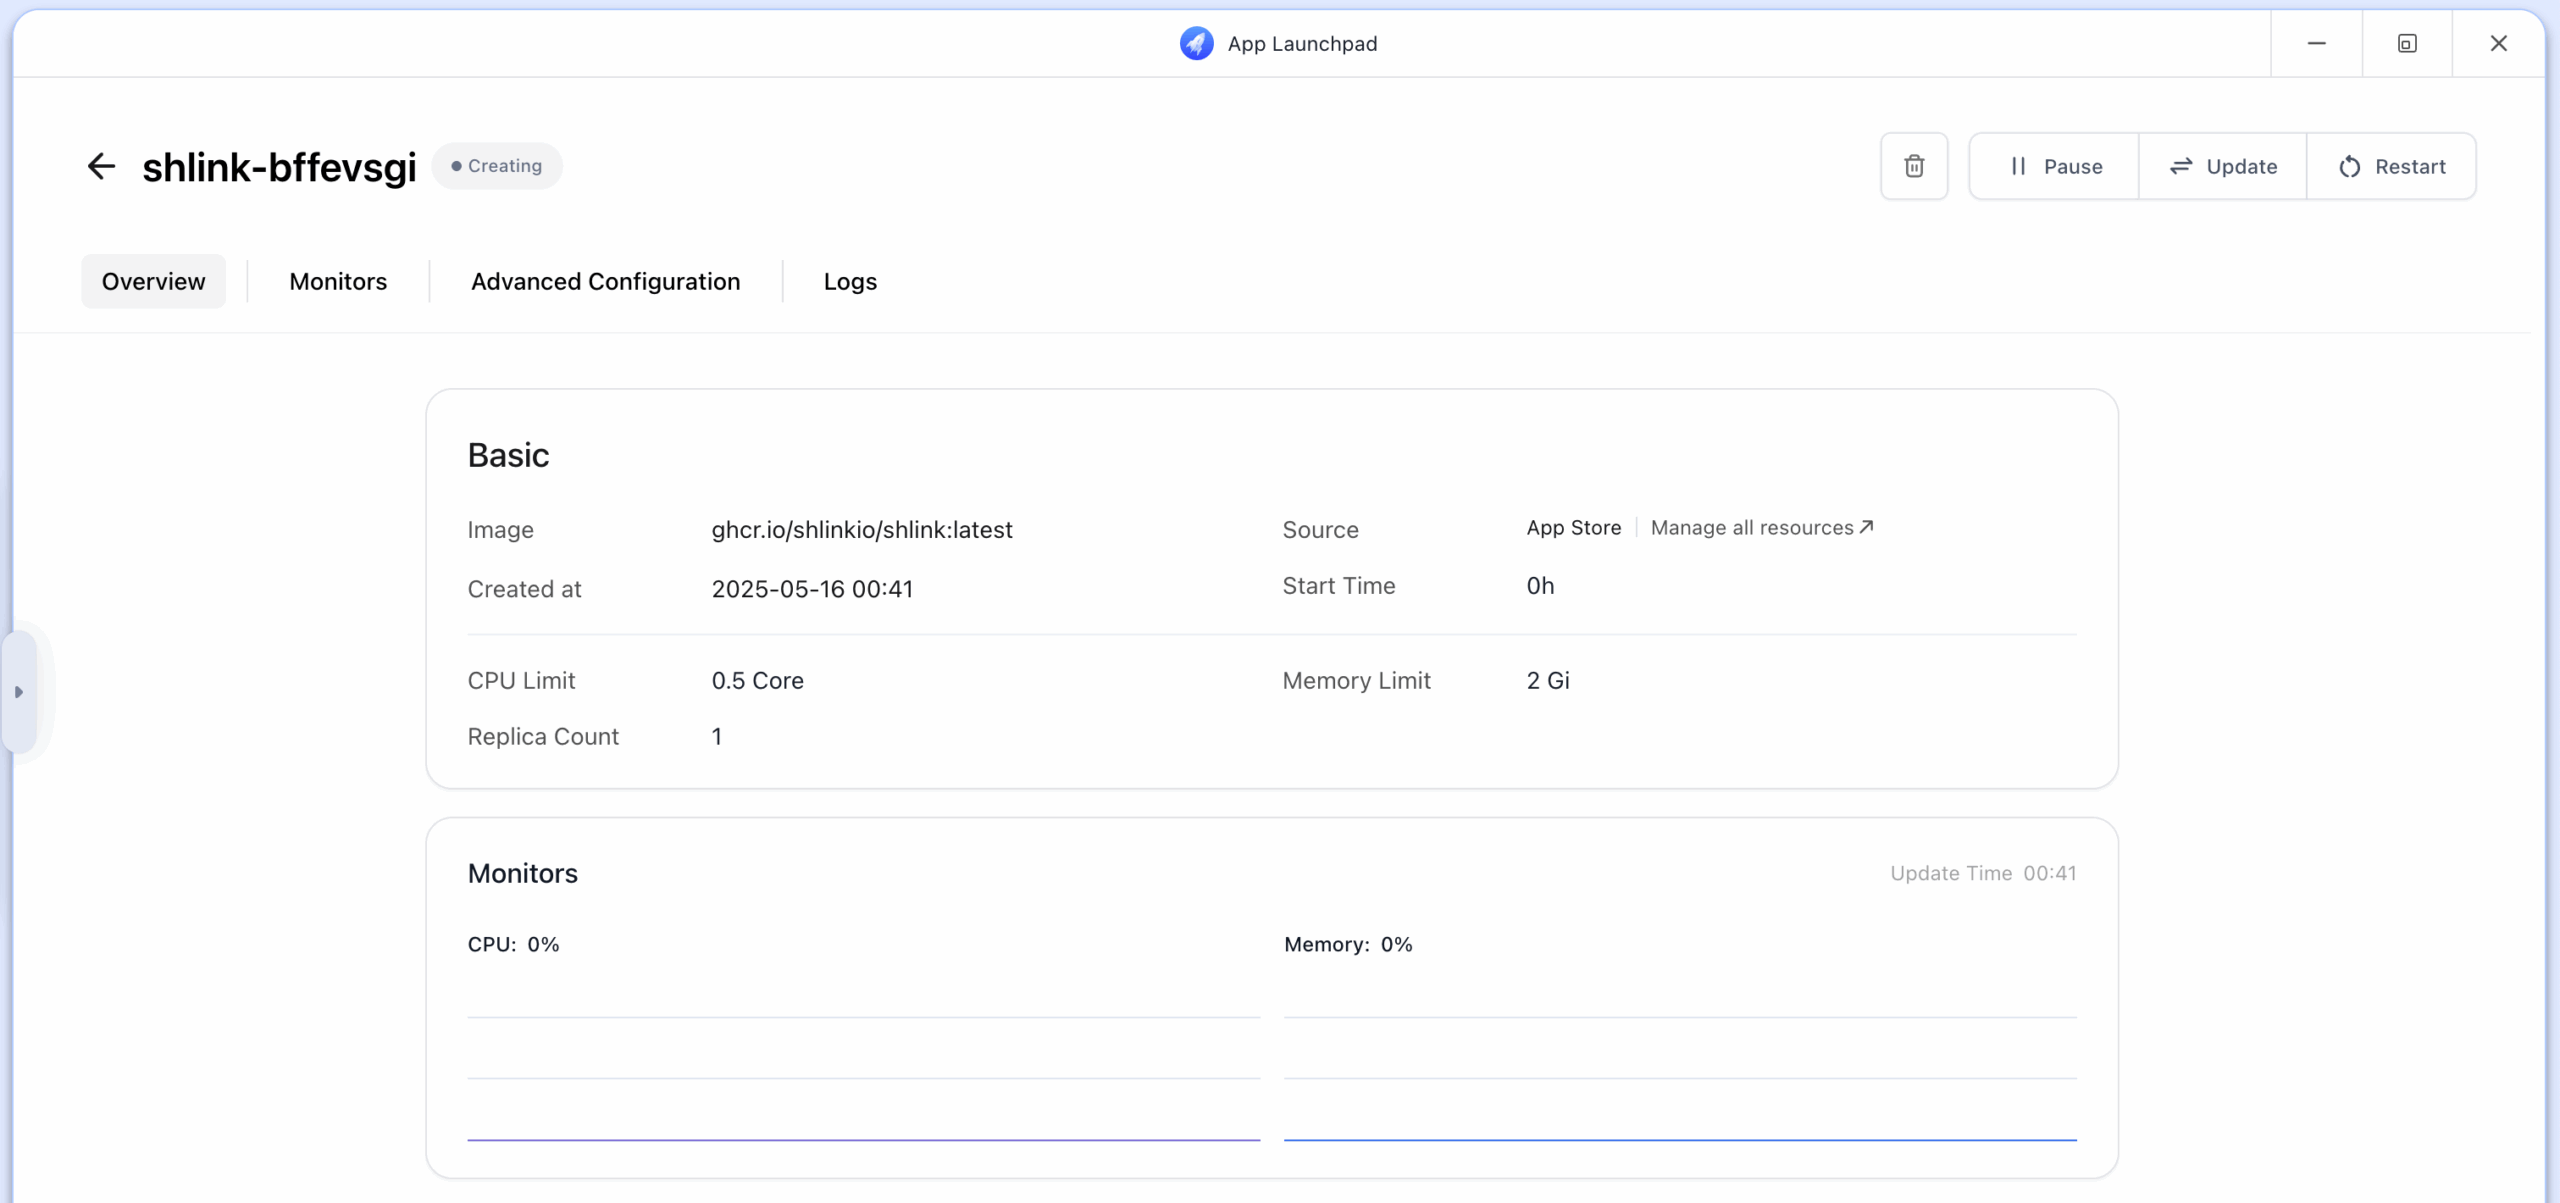
In the left-hand menu, click App Store and search for “Shlink.” - Deploy and Verify
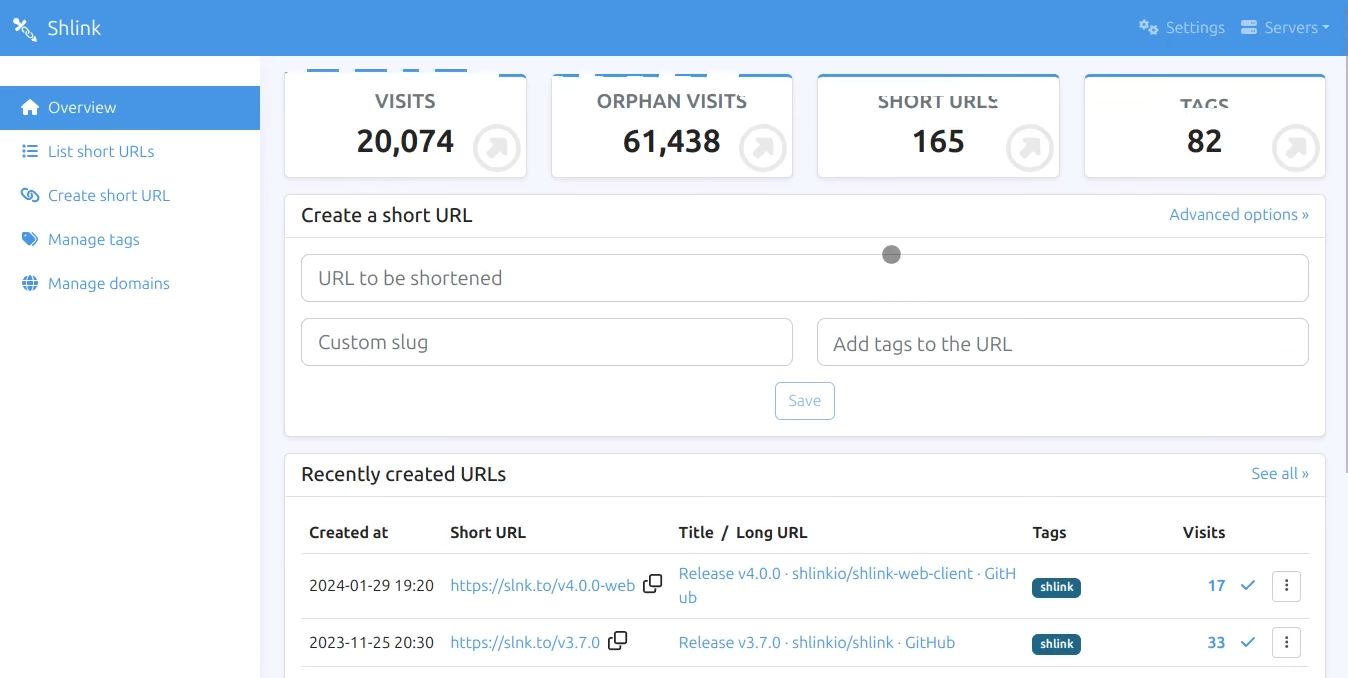
Click Deploy App. Within 3–5 minutes, your container should show as Running. Visit the temporary domain provided; if you see the Shlink setup page, your deployment was successful!
3. Advanced Configuration & Optimization
3.1 Custom Domain & HTTPS
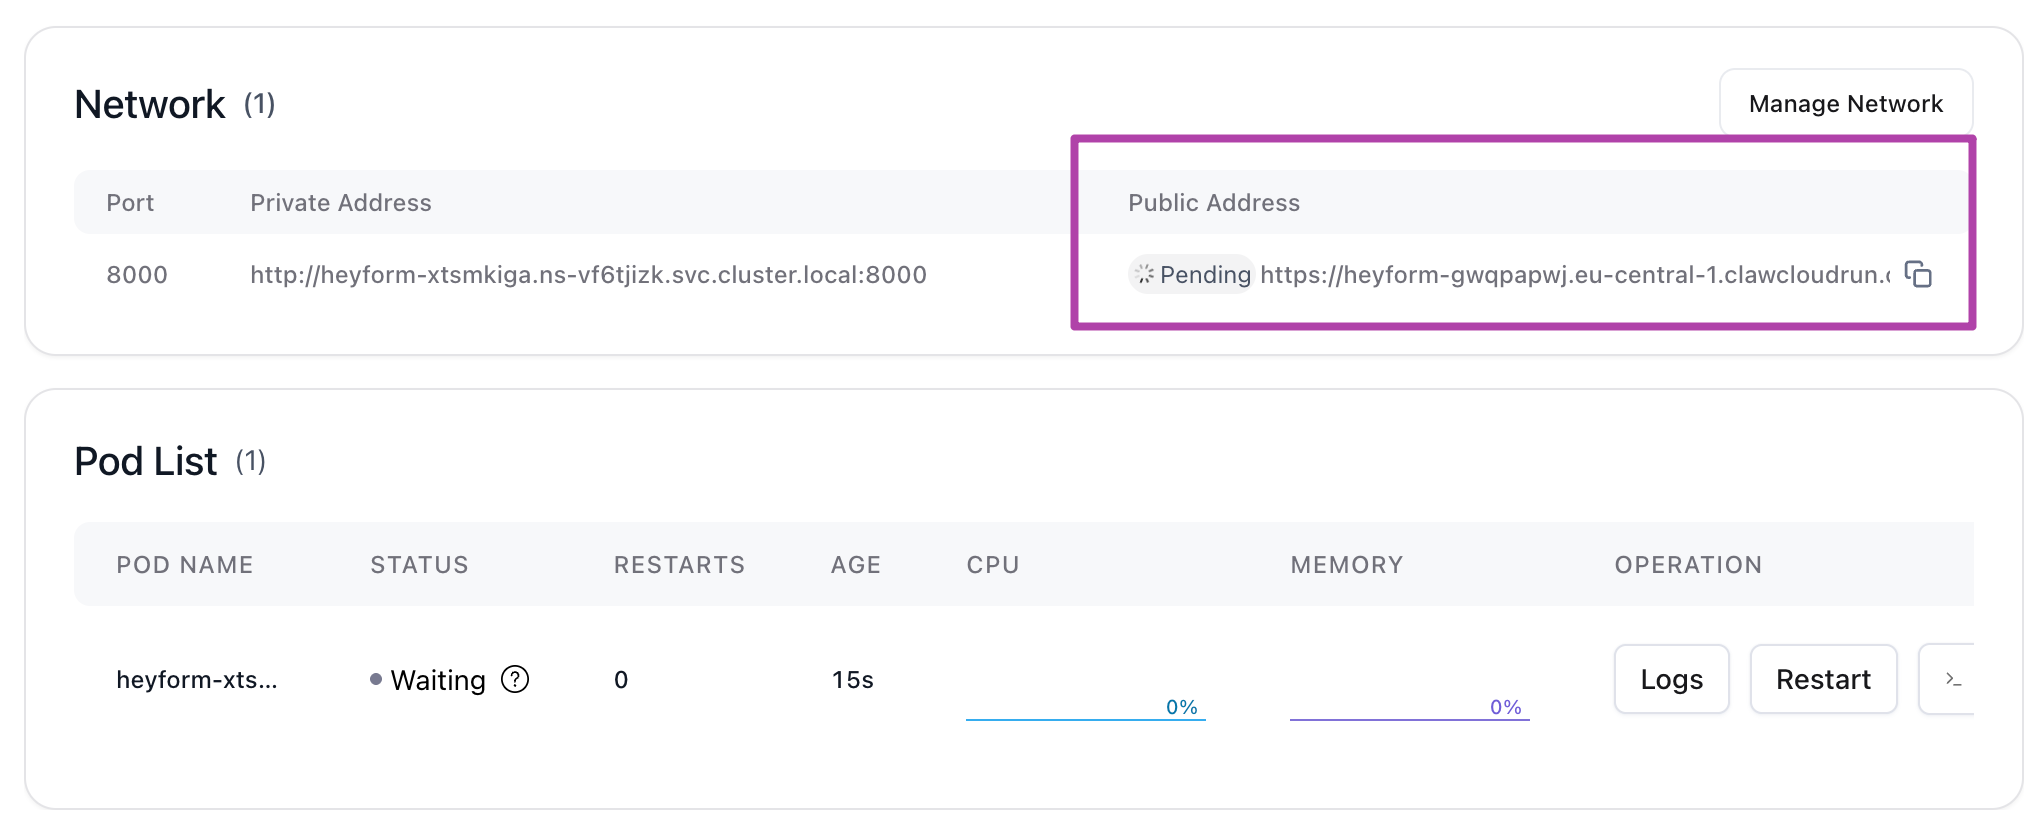
- Bind Your Domain
In your container’s management panel, open the Public Address tab to add your domain. Clawcloud will automatically provision a Let’s Encrypt certificate (allow 10–30 minutes; if issuance stalls, try restarting the container). - Enable CDN
For global acceleration, point your DNS to Cloudflare. To avoid certificate delays, disable Cloudflare’s proxy during the initial SSL issuance.
3.2 Database Migration & Scaling
- Switch to MySQL
Update your environment variables:DB_DRIVER=mysql DB_HOST=your-db-host DB_PORT=3306 DB_NAME=shlink DB_USER=root DB_PASSWORD=your-passwordEnsure you’ve deployed a MySQL container and that both containers share a network.
3.3 Installing the Web Client
- Generate an API Key
docker exec -it shlink-container shlink api-key:generate - Deploy the Web Dashboard
Launch a new container from theshlinkio/shlink-web-clientimage, settingSHLINK_SERVER_URLandSHLINK_SERVER_API_KEYin its environment.
4. Conclusion
Combining Clawcloud Run with Shlink gives individual developers and businesses a zero-cost, high-performance URL shortening solution. With the App Store’s one-click deploy and robust feature set, you can skip the DevOps headache and spin up a fully functional service in minutes. While you might encounter domain-resolution delays or Docker image quirks at first, pre-binding your domain, switching image sources, and consulting the Shlink Documentation will help you overcome these hurdles.
Get started now and unlock powerful link management and analytics with Clawcloud Run and Shlink!